Thursday, March 5, 2009

Analogy of a Gardener--My own Little Observations. . . .

This is coming as a comment to my daughter's blog (http://www.lordsofthemanor.blogspot.com/ ) where she shares "a story from the perspective of a farmer's field and how the little leaves are sprouting up happily in the sunshine when suddenly the tractor comes by and dumps a couple tons of manure on top of everything. And our perspective then as the crop is that something really cruddy has happened to us. Then we aren't sure what to do next because we are lost in our perspective of being covered in cow crap (or chicken, because we all know the chicken kind smells so much worse), and we can no longer see the sun and we certainly don't feel like we are growing when we'd just burst out only to be buried in crud again. But from the perspective of the Farmer, we are being strengthened and nourished and in the end will be a much greater crop to harvest. But from our view of things, we always react with feelings fear and avoidance to the sound of the tractor coming.

Having never heard this analogy before, it struck me that after running into my brick wall, I've felt very much covered in chicken shit on top of it all. Being in the refiners fire is a nice thought, but at some point I'm supposed to grow a little here and get my leaves to pop up through to the sunshine again, stronger, but it doesn't seem to be happening. . . ."

I have some thoughts to go along with this analogy--my own little observations from my experience in my own garden and life.

Coming from the gardeners perspective, when we put manure on our gardens, sometimes we actually get more weeds especially if we have used cow or horse manure. Cows and horses eat weeds and those pesky weed seeds manage to survive their digestive systems. That is one reason why chicken manure is a higher quality product to use on the garden. Sometimes also we put too much manure on the garden and it burns the plants we are actually trying to strengthen. And even though the manure can do a great deal to enrich the soil (mostly in adding organic material) the soil can also be lacking in other things that manure can't correct--deficiencies or pests that need other attention.

Sometimes what the soil needs is to lie fallow for a time, allowing the manure and other additives to enrich the soil and give it a rest so in some future time, the soil will be ready to accept new seedlings that will grow and produce an abundant crop.

Also it is interesting that the soil may be depleted with certain crops and yet it will accept others which actually bring back good things into the soil for future use--such as corn which is a heavy feeder versus green beans or peas which put high amounts of nitrogen back into the soil. Corn requires several additions of fertilizer and soil amendments throughout the growing season to produce a high quality and quantity crop. Green beans or peas give their all to produce a bountiful crop and to put good things back into the soil. So the wise farmer or gardener uses the technique of crop rotation so as not to deplete the soil. (This was one problem that farmers had during the "dust bowl" during the 1930's. The farmland was depleted and then winds came and blew off all the top soil.)

Here is another interesting thing about corn and green beans: We could start a total other analogy here. Corn takes so much to get a good crop. It requires good fertile soil, thinning, several applications of fertilizer, but it's yield is only about two ears of corn per stalk. When the growing season is over, the soil is depleted and needs to be built up again. Green beans, on the other hand, need little fertilizer, and aside from building a trellis for certain types, they will continue to produce as long as you water them and pick them. Then they leave the soil better than when you began. I ask myself, am I more like the corn or the green beans. Do I take more than I give? Do I leave things better than they were when I started?

Isn't it interesting that we can apply all these things to our own lives, our own "personal gardens?" Yes, sometimes we get the refining from experiences that the Lord allows us to have to experience growth in our lives as in the analogy of the manure. Because of this we have the opportunity for more and stronger growth in our lives. But sometimes we have more difficult problems that will take more than the manure to make us strong, we need reinforcements--friends, family, faith, etc. Sometimes we need a rest or a change in our thinking, or in the choices we are making, or to look at things from a different perspective. We can gather strength from others which will allow us to continue to grow without getting "burned out." Or perhaps there are people or circumstances in our lives that are actually toxic and are causing us too much difficulty and we need to "weed" them out. Other times we just have to trust in the Lord, the Ultimate Gardener, (isn't it interesting how the Lord uses so many examples of gardening in the New Testament?). The hardest thing is allowing the atonement to work in our lives--allowing the Lord to take our burdens that we are not capable of dealing with on our own. At any rate, it all sounds so easy when we talk about it, but it is a difficult process and one that no one in this life can avoid.

Thursday, February 26, 2009

THE THINGS WE SAY

Recently, I heard something said about the things we say. Are they appropriate? Here are the three guidelines I was given:

1. Is what you are about to say True? If it is not true or if you aren't absolutely sure it is true, Don't say it! Are you embellishing or dramatizing the facts to make it seem more interesting or colorful? If you are, Don't say it!

2. Is what you are about to say Kind? If your words are hurtful, or if they cause another to feel uncomfortable with what you are saying, Don't say it!


3. Is what you are about to say Necessary? Does it truly add to the conversation. If it does not add to the situation, Don't say it! If you are telling something only to bring attention to yourself, or, at the expense of someone else, Don't say it! If you are talking just to talk, Don't say it! Are you saying something to truly help the situation, or are you saying it to make yourself feel better? Are you saying something because you think you will look more important to someone else because of your knowledge or ability? If you are, don't say it! Are you sharing something with someone else that is not your's to share? If you are, don't say it!

These are good guidelines to live by. So many times we want to have the last word. Instead of listening to what others around us have to say, we are waiting to jump in with our "two cents." We have all been around the person who doesn't really listen to others, but is only interested in what they have to say. In contrast, we have also been around those who listen and are more interested in other's thoughts and feelings. They make us feel important and worthwhile because they are more interested in others instead of themselves. We are drawn to those people because they have the ability to help us feel better about ourselves. Most of us need to check ourselves and make sure we are following these guidelines. Most likely, if we do, we will find that we have better relationships with family, friends, business assoiciates and others.


Monday, February 16, 2009

THE NEXT ONE HUNDRED DAYS

I recently received the Winter 2009 BGS Update from Brigham Young University. This article was on the front page and I thought it was quite profound so I'm sharing it on my blog:

"A mother and her son celebrated as the child completed his 100th day of kindergarten. Early on in the school year, the new students participated in keeping a journal and recorded what they learned.

After 100 days of school, the boy came home elated. He said to his mom, "Do you want to know what I wrote in my journal?" The mom smiled and said, "Tell me." The boy exclaimed, "One hundred days ago I did not know how to read, write, or subtract or add numbers. Now I can read, write, and subtract and add numbers. I love school."

The mother was proud, amazed, and happy to see how exciting this was for her child. Throughout the night and the entire next days she was consumed with the idea of what could be accomplished in 100 days. what could she do if she set a goal and focused effort on it? Could it change her? Could she have a life-changing transformation in 100 days?

The story turned into what is known as "The Next 100 Days." Since that day of discovery, the mother lived life as usual--going to work, watching the kids, taking out the trash--but one thing was different. she had been working toward changing, learning, being something that she had never been before, with a specific goal in mind.

Not someday, sometime, somehow, but rather in "the next 100 days." If 100 days is long enough to take a five-year-old from not being able to read, write, and do math to doing all three, then it is certainly long enough to change some aspect of the mother's life, to reach a goal, to achieve some milestone. In fact, it is long enough for each of us to do something great. If a kindergartner can learn so much in 100 days, then why not you?

Concerning goals, Elder M. Russell Ballard said, "I am so thoroughly convinced that if we don't set goals in our life and learn how to master the technique of living to reach our goals, we can reach a ripe old age and look back on our life only to see that we reached but a small part of our full potential. When one learns to master the principles of setting a goal, he will be able to make a great difference in the results he attains in this life" (M. Russell Ballard, "Do Things That Make a Difference." Ensign, June 1983, 68).

Now what will you do in the next 100 days? What goals can you set and accomplish? Will you complete a course or perhaps even two? will you start on the course on your plan that you have been avoiding and tackle it with strength and determination/ Will you set a renewed goal to get going again. . . after being stalled for some time?

Set goals. challenge yourself. Reaching your goals will give you a feeling of accomplishment and peace. May you do great things this year throughout your life. And may you do great things these next 100 days."

Tuesday, January 20, 2009

Healthy Eating and Menus!

In an effort to feed my family more nutritious meals, save money, and to lose the headache of coming up with ideas for dinner, I decided to plan weekly menus. My daughter asked me to send my menus to her, so instead I am posting them on my blog. I could have set this up on a spreadsheet program, but for me it was just easier to sit down for a few minutes at the beginning of each week and plan out a few meals. After a few weeks, I will be able to start repeating my menus.

I picked up a 5 X 7 journal at the local craft store from the $1.00 bin. I divided the first page into grids and planned one week of breakfast and dinner menus. I rarely fix breakfast for my 17 yr-old son and 21 yr-old daughter anymore (they are out the door at different times of the day and take care of themselves as far as breakfast goes) and Jim rarely eats breakfast except on the weekend or holidays, but this gave me a basic plan for myself. I always eat breakfast and it is just nice to have a plan. (You might also notice, I don't eat cold cereal for breakfast. It doesn't fill me up so I end up eating several bowls to be satisfied; it is expensive; I never feel very well after I eat it so it is a rarity that I eat it; I also can't stand it unless it has tons of added sugar.)

I added little notes on each day if there is something out of the ordinary that I need to figure in to my plan. I didn't include lunch since I usually eat something simple or use up the leftovers in my refrigerator. On page two I made a shopping list. My plan is still flexible enough that if it ends up that I don't feel like making what is planned, I can swap it out for one of the other meals. It has helped to avoid the unhealthy foods and the last minute, "Let's order Chinese Food!" So we are eating more healthy and saving money too. Also note that Fridays are Pizza night so we always have pizza. It might be French Bread Pizza, or regular pizza, or on some occasions we will pick up or order a fast food pizza. Here are two weeks worth of my menus.

Monday FHE
Whole Wheat English Muffin w/ Peanut Butter & Banana

Homemade Minestrone Soup Whole Wheat Bread

Tuesday SWIM MEET
Omelet

Hawaiian Haystacks

Wednesday
Oatmeal w/ fruit & almonds

Yakatori Noodle Bowls, Green Salad

Thursday SCOUTS & BOOK CLUB
Eggs and Toast

Leftovers
Friday--Pizza Night!
Oatmeal w/ fruit & almonds

French Bread Pizza
Saturday YOUTH DANCE
Omelet

Taco Salad

Sunday
Oatmeal

Ham, Baked Potatoes Green Salad, Corn
Monday, FHE HOLIDAY
Eggs and Toast

Hamburgers, French Fries, Green Salad

Tuesday MUTUAL
Boiled egg

Tomato Soup, Grilled Cheese Sandwiches

Wednesday
Oatmeal with Bananas & almonds

Corned Beef Hash, Green Salad, Carrots

Thursday, SCOUTS SWIM MEET
Whole Wheat English Muffins with P/B & Banana

Chili Sauce Chicken, Yams, Green Salad, Green Beans

Friday--Pizza Night!
Omelet with veggies

Homemade Pizza

Saturday
Eggs & Toast

Tacos (Make sure we have avocados!)

Sunday--STAKE CENTER DEDICATION
Whole Wheat Eng Muffin with P/B & Banana

Baked Chicken Breast, Sour Cream Potatoes, Green Salad, Veg

Here are a some of the recipes I use for these two weeks of menus:

ALICE'S CHILI SAUCE CHICKEN
Spray fry pan with nonstick spray
Fry boneless skinless chicken pieces until brown and cooked through
(You can use either breasts or thighs. Thighs come in smaller portions and are less expensive. A breast is usually large enough for two portions.)
Pour 1 pint jar (or less) of chili sauce or salsa over chicken pieces
Heat thoroughly
Top with Mozzarella or pepper jack cheese
Heat until cheese is melted
ALICE'S MINESTRONE SOUP
(This makes a big pot and some can be frozen to used at another time!)
1 quart tomatoes
1 lb. ground beef
1 onion, chopped
1 large potato, diced
2-3 stalks celery, diced
2 garlic cloves
1 qt. water
2-3 large carrots, peeled and sliced
2 8 oz cans tomato sauce
1 can diced tomatoes
1 15 oz can garbanzo beans, drained
1 16 oz can green beans, drained
1 15 oz can kidney beans, drained
1 can beef or chicken broth
1 1/4 cups macaroni (whole wheat) or penne pasta, uncooked
1 Tbsp Worcestershire sauce
2-3 dashes Tabasco sauce
2-3 dashes cayenne pepper (more if you like it spicier! I like it to be on the spicy side.)
1/2 tsp thyme
1 Tbsp Dried parsley
1 tsp basil
1 tsp dried oregano
Salt & pepper to taste
Freshly grated Parmesan cheese for garnish (opt.)
Puree tomatoes in blender. In a large pot or dutch oven, combine all ingredients except macaroni and cheese. Bring to a boil, then add macaroni and cook 15-20 minutes until macaroni is tender. Garnish with Parmesan cheese.
Rachel Ray's Yakatori Noodle Bowls
Cook 1 pkg Whole Wheat Spaghetti or Soba Noodles.
In a large frying pan or wok:
Spray pan with Nonstick spray or use Canola oil to stir fry:
Boneless Skinless Chicken Cut into Bite size pieces
Peel fresh ginger then grate and add to chicken (I bought a big piece--it had three fingers. Rachel said to peel and freeze, It can be pulled out of the freezer and grated and it works better than fresh. I used one finger of ginger.) When Chicken is done, add:
2 bunches green onion cut into approx 1 inch pieces
1 Can Chicken broth
1/3 Cup Tamari (aged soy) I just used soy sauce
Drizzle with honey (I used about 3 tsp)
Reduce Heat and let thicken a little, then drizzle with Sesame Oil. Pour over drained noodles and mix together. Top with Toasted Sesame Seeds.
This was really good! Rachel Ray had this on her television show. She claimed it was healthy and appealing to children. My family enjoyed it! You can check this and other recipes out on http://www.rachelray.com/
HOMEMADE FRENCH FRIES!
Even though Homemade French Fries are still filled with fat, they are delicious and easy!
Wash large potatoes thoroughly. I don't peel my potatoes, I fry them with the skins. It is just much easier that way! Cut potatoes into wedges or if you like them smaller go for it. Put potatoes into a dutch oven filled with hot oil. Do not stir too much at first. Wait until fries are starting to get a little crispy or they could fall apart and won't be as appetizing. When they are getting lightly browned remove fries. Drain on a paper towel or napkin. Sprinkle with Salt immediately. Serve. Note: Be cautious. The oil is very hot and can cause serious burns. Also make sure you don't leave while the fries are cooking. If grease spills, it could cause a fire.
HOMEMADE FRENCH FRIES--Healthy option
These have a fraction of the calories of the original!
Wash and cut potatoes into wedges
Spray potatoes with nonstick cooking spray
Sprinkle with Mrs. Dash or Salt
Place on cookie sheet
Bake at 400 degrees until potatoes are done
CORNED BEEF HASH
Sliced potatoes
Sliced or chopped onions
1 Can Corned Beef
Salt & Pepper
Water
Use amounts that will make enough for your family. Slice Potatoes, onions, add chopped up corned beef, salt and pepper. Add a little water, Bake covered in a heavy pan or dutch oven until potatoes are tender. Serve.


Tuesday, November 4, 2008

Make a Stack n Whack Quilt!

I made a "Stack n Whack quilt for my son, Jeff and his bride, Tammy's wedding present. I have had several friends and family who have asked me for the instructions to make one. Here are pictures of the finished "wedding quilt" and instructions to make your own. I made this quilt with the generous help of my wonderful, talented, quilter cousin, Jean McDaniel. The fabric from Jean's stack n whack was a colorful (vivid pinks, reds, blues, yellows, greens) school of fishes. It was beautiful too. Finished quilt on a queen sized bed:
Here I am with Jeff and Tammy's finished quilt above.
FOUR SQUARE STACK N WHACK QUILT

Fabric Selection: You want to buy a fabric that has a very good repeat in the pattern. Oriental prints work really well. You don’t want it to be too busy or your won’t see a really good kaleidoscope or twist effect that you want in the stack n whack quilt. You want a good background, but not too much, so that the pattern in your quilt will show up. You will need at least four repeats of your pattern, plus a little extra for adjusting fabric, etc. My pattern repeats were about 21-23 inches apart, so there were lots of different details in the fabric which allowed it to have a huge variety and every finished block was different! Use 100% cotton fabric. Because the repeats in each fabric are different, I couldn’t tell you how much fabric to purchase, so make sure you get enough or make sure that the fabric is still available if you need extra. If you are making a queen size quilt, I would recommend getting enough to have eight repeats of fabric. The quilt I made for Jeff and Tammy, was an oriental print. It was beautiful. It had a black background with cranes, lilies, flowers, etc. It had a lot of variety of purples, creams, and golds. It turned out beautiful. I am now making a quilt for myself using a fabric print from Benartex “Giverny”. It also has a black background, but has reds, pinks, golds, etc. I’m excited and looking forward to finishing and keeping a quilt for myself! Here is my fabric below:


For more ideas on making a stack n whack quilt, check out this website: www.hgtv.com/hgtv/shows_qlt/episode/0,1806,HGTV_3876_8065.00.html

Cutting and Sewing Instructions:

1. Wash and press your fabric, being careful not to pull or stretch fabric.
2. Tear fabric in half lengthwise on the grain. This means that on the center of your fabric, you will have a selvage on the right side and a selvage on the left. You will end up with two pieces approximately 22 inches wide, each will have a selvage and each will have a raw edge. Do not tear fabric on the crosswise of the grain. When I made my quilt, I set aside one of the halves of fabric to be used later for the borders. You could do the same or you could use the other half to make more blocks depending on your choice. I ended up needing a lot more fabric than originally thought for a queen/king quilt so you could use both sides and then have borders from another contrasting fabric. It is your choice.
3. Find the repeats in your fabric. You need to have four repeats so when you cut your fabric, you will have four identical pieces of fabric that will line up exactly the same when stacked on top of each other.
4. Using your Ruler and rotary cutter, cut your fabric crosswise so you will have four pieces rectangular/square in shape which when you stack them on top of each other, they will line up exactly one on top of the other. Use pins to make sure you are lined up as fabric tends to give and move; you might have to play with it a bit depending on your fabric.
5. After everything is lined up, you should have a stack of four fabric pieces each identical to each other. Using your rotary cutter, cut five inch strips through the stack, being careful to not let fabric move out of place. The quilt I am currently making has a 22 inch repeat. I will get four stacks of strips that are 5 Inches by 22 inches.
6. Keeping the stacks of strips still together (Make sure they are secured so they don’t move and have your squares get out of alignment), using your rotary cutter, cut each stack into 5 inch squares. You should have four stacks of squares from each strip. From that one repeat of fabric (four fabrics stacked on top of each other) you should get 16 stacks of 5 X 5 squares. These will be the focus of your finished blocks! (Again, these calculations are based on my fabric which had a 22 inch repeat. Yours will differ a bit depending on the repeats in your fabric.) Here are eight stacks of squares. Each stack will make a completed block once I add borders:
7. Take one stack of 5 X 5 blocks, place one 5 " square on your work surface, place another identical sqare next to it, but turn it one quarter, continue on with each of the four blocks setting them up to make a block. As you do this, you will see a Kaleidoscope pattern in the block. Play with your block until you are satisfied with the outcome, then stitch them together with a ¼ inch seam allowance. Press finished block. Here are the four identical 5X5 squares before I rotated them into sewing position. You can see that depending on which corner of the squares I put in the center, I will have a completely different block. You also can get a real twist in the block which makes it very interesting. Original four 5" identical squares:

With each block, you will have four choices of how you want your final block to appear. From these original squares, here is choice #1:

Change center point of your block and you have choice #2:


Choice #3:

Choice #4. Notice the wreath affect in the middle of this one:

Which block do you like the best? I don't know. They are all beautiful and it is entirely your own taste. Now can you see that every single block cut from one piece of fabric could appear to be cut from a completely different fabric? It really makes your quilt look like you have spent hours searching for fabric or fussy cutting each block! It is very impressive.

8. Complete four-square blocks. From pictures (because I don’t have the finished quilt with me) it appears that the quilt I made for Tammy and Jeff’s wedding had thirty finished blocks, plus borders. I couldn’t tell you how wide I made the borders, I just looked things over until I got it the way it looked good to me. You can use wide borders, narrow borders, etc. If you wanted to have only the stack n whack blocks, you could do that too. It is totally up to you.

Putting the quilt together:
The following are the instructions to finish the quilt, but we didn’t figure on enough blocks, so you will want to refigure depending on how big your quilt is. The finished quilt that I made for Jeff and Tammy had 30 completed blocks. So to make that quilt, you would need at least 8 repeats of fabric as I stated earlier. That is also based on the fact that you will need to get at least 15 completed blocks from four fabric repeats. I was able to get 16. When I do four more fabric repeats making a total of 8, I ended up with two extra blocks to play with.

Every other block will be set on point: For the blocks that will be set on point, you will need a contrasting fabric (I used a cream fabric to make my colors really stand out. I like a light fabric since the main fabric in my quilts have such bold colors.)We will call this color #1.
A. Using your rotary cutter, cut 7 ½ inch squares from Color #1. Then cut squares in half diagonally. You will need two squares or four diagonals for each block that is set on point.

B. Sew ¼ inch seams putting a diagonal to each side of four-square blocks that will be set on point. This will make your finished block square to match the other blocks, but the center print block will be set on point. Sorry I don’t have an exact amount of fabric for you, so do the math or be sure to get plenty of fabric. Press.

Squared –off blocks: For these blocks, you will need two borders. I put one border (color #1-cream color) next to the print block. Then a purple border (color #2) for the outside border of the block. Sorry, I don’t have exact amounts or sizes on this because when we figured it, the first time, we made a mistake in our calculations and the borders made the blocks too big to match up to the point-set blocks. So play with it a little to figure out how big you want your borders.

Finishing your quilt:
When your blocks are finished, lay your blocks out in a big area where you can look at them at play with them. Move them around until get it the way you like it. Then sew it all together! Here is a basic layout of my quilt, minus the outside borders. However, on mine, the squared off blocks have two borders instead of one:

I finished my quilt with borders of the same oriental print fabric. I used the ½ of the fabric that I set aside at the beginning and I believe I divided that 22 inch width fabric into fours and that made my borders? That would mean my borders were about 5 ½ inches wide. I found a pretty purple fabric for my backing. My fabulous cousin, Jean McDaniel, did the machine quilting for me. (She did an amazing job.) I bound the quilt in the purple fabric print (color #2).
Oops! I am relooking at my pictures, and I see I can't even count! There are at least 35 blocks on that wedding quilt not 30. So calculate your quilt accordingly. A thirty block quilt would probably make a full-size quilt. Sorry!
Check out Jean's website: www.santiamriverquilts.com


Tuesday, September 16, 2008

"TILL THE COWS COME HOME"

I have been peeling tomatoes while preparing to make a salsa recipe that my cousin, Gay shared with me. She told me to "cook it till the cows come home." I have been thinking about that idea and what it means and it has led me to other rambling and reminiscent thoughts. Gay was raised on a dairy farm in Star Valley, Wyoming. She lived out of the city limits of Afton, while I was a "city girl" in the booming town of about 1,200. From what my mother has told me about farm life, I understand that after the cows are milked in the wee morning hours, they are taken to the pasture where they can graze for the day; when milking time comes again, they are ready and willing to make the trip back to the barn to be milked. I do remember from time to time, being at Aunt Mae's home and going with Gay or Patrice to get the cows. The cows came right along, slowly, after being away all day. So in other words, "till the cows come home" is an all day thing. . . . Another thought about the cows. . . . I remember springtime in Star Valley and how going down to Uncle Morris' how the manure smell was especially potent. I made comments about it stinking and he said that it was the greatest smell on Earth. Now when I spread manure on my garden and the kids complain because of the smell, I don't think it is all that bad? Funny how our perspective changes with life experiences.

I have many fond memories of Star Valley and I find it interesting that I am constantly running into people who know someone who lives there, has lived there themselves, or has family who has or does live there. Mother and I went to a local farm recently to buy some cucumbers (ours didn't do well at all) and in speaking with the owner, it came out that he has family who lived in Star Valley many years ago--Ollie and Evie Petersen. Mother had heard of them, but they had left the "Valley" years ago.

A few years ago, when Matthew was returning home from his mission to Denver, Colorado, we were anxiously waiting at the Portland airport. Because of the changes in the security at the airports, of course we couldn't go right up to the terminal but had to wait behind the security gates. We had no idea which flights were coming through at the time, so I stopped a girl who had just come through and asked her where she was from. I really meant where did you fly from, but she took it literally and said, "Star Valley, Wyoming!" (What are the chances of that?) I told her that I too, was from Star Valley and told her my maiden name. She excitedly told me that her best friend was Ashley (my first cousin). What a coincidence. It is interesting how so many people know about Star Valley, but it really is a wonderful, beautiful place so I guess it isn't all that strange after all.

When Gay first gave me her salsa recipe and told me to "cook it till the cows come home," I didn't have the patience and instead drained off most of the liquid so it would thicken more quickly. When I told Gay about it, she said, "I told you to cook it till the cows come home." This time I am going to exert more patience, I think that must be another lesson to learn when dealing with cows and other things. . . . Here is Gay's salsa recipe:

GAY'S SALSA
8 quarts tomatoes, peeled and chopped (I like Roma the best)
8 cups onions chopped
4 cups green peppers chopped
2 1/2 cups white vinegar
1 cup fresh cilantro, chopped
1/2 cup salt
2 Tbsp garlic powder
2 tsp black pepper
Jalapeno peppers chopped (15-16 to taste)
Put all ingredients in a very large kettle and "cook it till the cows come home!"
Pour salsa into hot jars and process according to canning guidelines for your state.

Monday, September 15, 2008

THE PAINTER WITHIN. . . .

Our most recent goal has been to finish up the uncompleted projects before the winter rains and cold weather come. (Our winters here are generally pretty mild, but we are still limited on what can and should be done during that time.) Anyway, one of the projects has been to finish the siding on our house. We focused on that over Labor Day. We rented a roofing gun and special cutters for the siding only to find out later, that our neighbor had them and would have generously loaned them to us. Even though it was a relatively easy project, our stress levels were a little high. After we got the knack of it, Nathan, Mary, and I were good contributors to the project. We got to be pretty proficient at using the power tools and actually fitting and nailing the siding to the house. That allowed Jim to focus on the details such as fitting the siding around the gas meter, phone box, and placing the electrical boxes. We finished the South side of our house. I got it painted and now I'm moving on to some of our other unfinished projects.

Here I am with the measuring stick Jim made so we could get accurate placement of the siding.
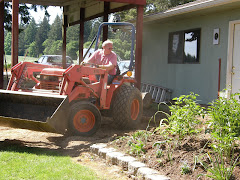
Nathan, Jim, and Mary. Half of the south side is finished.


SLACKER!

I am leaving for Utah in nine days; I'm trying to get as much done as possible before I leave. I have been staining the doors that I never finished with our home addition, canning, and I even painted the chimney?!! The chimney? I have been accused of finding painting jobs if there are none available. I guess it is genetic. I remember my grandmother (who lived next door to us for much of my childhood) constantly having painting projects she was doing. I remember that she painted her sidewalks every spring. I haven't done that yet. (Jim won't let me!) I still have some other touch up painting to finish on the house trim and also the siding on the West side when we get that finished. That should satisfy the painter in me. Our shop will be needing paint in the Spring. . . .