Tuesday, November 4, 2008

Make a Stack n Whack Quilt!

I made a "Stack n Whack quilt for my son, Jeff and his bride, Tammy's wedding present. I have had several friends and family who have asked me for the instructions to make one. Here are pictures of the finished "wedding quilt" and instructions to make your own. I made this quilt with the generous help of my wonderful, talented, quilter cousin, Jean McDaniel. The fabric from Jean's stack n whack was a colorful (vivid pinks, reds, blues, yellows, greens) school of fishes. It was beautiful too. Finished quilt on a queen sized bed:
Here I am with Jeff and Tammy's finished quilt above.
FOUR SQUARE STACK N WHACK QUILT

Fabric Selection: You want to buy a fabric that has a very good repeat in the pattern. Oriental prints work really well. You don’t want it to be too busy or your won’t see a really good kaleidoscope or twist effect that you want in the stack n whack quilt. You want a good background, but not too much, so that the pattern in your quilt will show up. You will need at least four repeats of your pattern, plus a little extra for adjusting fabric, etc. My pattern repeats were about 21-23 inches apart, so there were lots of different details in the fabric which allowed it to have a huge variety and every finished block was different! Use 100% cotton fabric. Because the repeats in each fabric are different, I couldn’t tell you how much fabric to purchase, so make sure you get enough or make sure that the fabric is still available if you need extra. If you are making a queen size quilt, I would recommend getting enough to have eight repeats of fabric. The quilt I made for Jeff and Tammy, was an oriental print. It was beautiful. It had a black background with cranes, lilies, flowers, etc. It had a lot of variety of purples, creams, and golds. It turned out beautiful. I am now making a quilt for myself using a fabric print from Benartex “Giverny”. It also has a black background, but has reds, pinks, golds, etc. I’m excited and looking forward to finishing and keeping a quilt for myself! Here is my fabric below:


For more ideas on making a stack n whack quilt, check out this website: www.hgtv.com/hgtv/shows_qlt/episode/0,1806,HGTV_3876_8065.00.html

Cutting and Sewing Instructions:

1. Wash and press your fabric, being careful not to pull or stretch fabric.
2. Tear fabric in half lengthwise on the grain. This means that on the center of your fabric, you will have a selvage on the right side and a selvage on the left. You will end up with two pieces approximately 22 inches wide, each will have a selvage and each will have a raw edge. Do not tear fabric on the crosswise of the grain. When I made my quilt, I set aside one of the halves of fabric to be used later for the borders. You could do the same or you could use the other half to make more blocks depending on your choice. I ended up needing a lot more fabric than originally thought for a queen/king quilt so you could use both sides and then have borders from another contrasting fabric. It is your choice.
3. Find the repeats in your fabric. You need to have four repeats so when you cut your fabric, you will have four identical pieces of fabric that will line up exactly the same when stacked on top of each other.
4. Using your Ruler and rotary cutter, cut your fabric crosswise so you will have four pieces rectangular/square in shape which when you stack them on top of each other, they will line up exactly one on top of the other. Use pins to make sure you are lined up as fabric tends to give and move; you might have to play with it a bit depending on your fabric.
5. After everything is lined up, you should have a stack of four fabric pieces each identical to each other. Using your rotary cutter, cut five inch strips through the stack, being careful to not let fabric move out of place. The quilt I am currently making has a 22 inch repeat. I will get four stacks of strips that are 5 Inches by 22 inches.
6. Keeping the stacks of strips still together (Make sure they are secured so they don’t move and have your squares get out of alignment), using your rotary cutter, cut each stack into 5 inch squares. You should have four stacks of squares from each strip. From that one repeat of fabric (four fabrics stacked on top of each other) you should get 16 stacks of 5 X 5 squares. These will be the focus of your finished blocks! (Again, these calculations are based on my fabric which had a 22 inch repeat. Yours will differ a bit depending on the repeats in your fabric.) Here are eight stacks of squares. Each stack will make a completed block once I add borders:
7. Take one stack of 5 X 5 blocks, place one 5 " square on your work surface, place another identical sqare next to it, but turn it one quarter, continue on with each of the four blocks setting them up to make a block. As you do this, you will see a Kaleidoscope pattern in the block. Play with your block until you are satisfied with the outcome, then stitch them together with a ¼ inch seam allowance. Press finished block. Here are the four identical 5X5 squares before I rotated them into sewing position. You can see that depending on which corner of the squares I put in the center, I will have a completely different block. You also can get a real twist in the block which makes it very interesting. Original four 5" identical squares:

With each block, you will have four choices of how you want your final block to appear. From these original squares, here is choice #1:

Change center point of your block and you have choice #2:


Choice #3:

Choice #4. Notice the wreath affect in the middle of this one:

Which block do you like the best? I don't know. They are all beautiful and it is entirely your own taste. Now can you see that every single block cut from one piece of fabric could appear to be cut from a completely different fabric? It really makes your quilt look like you have spent hours searching for fabric or fussy cutting each block! It is very impressive.

8. Complete four-square blocks. From pictures (because I don’t have the finished quilt with me) it appears that the quilt I made for Tammy and Jeff’s wedding had thirty finished blocks, plus borders. I couldn’t tell you how wide I made the borders, I just looked things over until I got it the way it looked good to me. You can use wide borders, narrow borders, etc. If you wanted to have only the stack n whack blocks, you could do that too. It is totally up to you.

Putting the quilt together:
The following are the instructions to finish the quilt, but we didn’t figure on enough blocks, so you will want to refigure depending on how big your quilt is. The finished quilt that I made for Jeff and Tammy had 30 completed blocks. So to make that quilt, you would need at least 8 repeats of fabric as I stated earlier. That is also based on the fact that you will need to get at least 15 completed blocks from four fabric repeats. I was able to get 16. When I do four more fabric repeats making a total of 8, I ended up with two extra blocks to play with.

Every other block will be set on point: For the blocks that will be set on point, you will need a contrasting fabric (I used a cream fabric to make my colors really stand out. I like a light fabric since the main fabric in my quilts have such bold colors.)We will call this color #1.
A. Using your rotary cutter, cut 7 ½ inch squares from Color #1. Then cut squares in half diagonally. You will need two squares or four diagonals for each block that is set on point.

B. Sew ¼ inch seams putting a diagonal to each side of four-square blocks that will be set on point. This will make your finished block square to match the other blocks, but the center print block will be set on point. Sorry I don’t have an exact amount of fabric for you, so do the math or be sure to get plenty of fabric. Press.

Squared –off blocks: For these blocks, you will need two borders. I put one border (color #1-cream color) next to the print block. Then a purple border (color #2) for the outside border of the block. Sorry, I don’t have exact amounts or sizes on this because when we figured it, the first time, we made a mistake in our calculations and the borders made the blocks too big to match up to the point-set blocks. So play with it a little to figure out how big you want your borders.

Finishing your quilt:
When your blocks are finished, lay your blocks out in a big area where you can look at them at play with them. Move them around until get it the way you like it. Then sew it all together! Here is a basic layout of my quilt, minus the outside borders. However, on mine, the squared off blocks have two borders instead of one:

I finished my quilt with borders of the same oriental print fabric. I used the ½ of the fabric that I set aside at the beginning and I believe I divided that 22 inch width fabric into fours and that made my borders? That would mean my borders were about 5 ½ inches wide. I found a pretty purple fabric for my backing. My fabulous cousin, Jean McDaniel, did the machine quilting for me. (She did an amazing job.) I bound the quilt in the purple fabric print (color #2).
Oops! I am relooking at my pictures, and I see I can't even count! There are at least 35 blocks on that wedding quilt not 30. So calculate your quilt accordingly. A thirty block quilt would probably make a full-size quilt. Sorry!
Check out Jean's website: www.santiamriverquilts.com


Tuesday, September 16, 2008

"TILL THE COWS COME HOME"

I have been peeling tomatoes while preparing to make a salsa recipe that my cousin, Gay shared with me. She told me to "cook it till the cows come home." I have been thinking about that idea and what it means and it has led me to other rambling and reminiscent thoughts. Gay was raised on a dairy farm in Star Valley, Wyoming. She lived out of the city limits of Afton, while I was a "city girl" in the booming town of about 1,200. From what my mother has told me about farm life, I understand that after the cows are milked in the wee morning hours, they are taken to the pasture where they can graze for the day; when milking time comes again, they are ready and willing to make the trip back to the barn to be milked. I do remember from time to time, being at Aunt Mae's home and going with Gay or Patrice to get the cows. The cows came right along, slowly, after being away all day. So in other words, "till the cows come home" is an all day thing. . . . Another thought about the cows. . . . I remember springtime in Star Valley and how going down to Uncle Morris' how the manure smell was especially potent. I made comments about it stinking and he said that it was the greatest smell on Earth. Now when I spread manure on my garden and the kids complain because of the smell, I don't think it is all that bad? Funny how our perspective changes with life experiences.

I have many fond memories of Star Valley and I find it interesting that I am constantly running into people who know someone who lives there, has lived there themselves, or has family who has or does live there. Mother and I went to a local farm recently to buy some cucumbers (ours didn't do well at all) and in speaking with the owner, it came out that he has family who lived in Star Valley many years ago--Ollie and Evie Petersen. Mother had heard of them, but they had left the "Valley" years ago.

A few years ago, when Matthew was returning home from his mission to Denver, Colorado, we were anxiously waiting at the Portland airport. Because of the changes in the security at the airports, of course we couldn't go right up to the terminal but had to wait behind the security gates. We had no idea which flights were coming through at the time, so I stopped a girl who had just come through and asked her where she was from. I really meant where did you fly from, but she took it literally and said, "Star Valley, Wyoming!" (What are the chances of that?) I told her that I too, was from Star Valley and told her my maiden name. She excitedly told me that her best friend was Ashley (my first cousin). What a coincidence. It is interesting how so many people know about Star Valley, but it really is a wonderful, beautiful place so I guess it isn't all that strange after all.

When Gay first gave me her salsa recipe and told me to "cook it till the cows come home," I didn't have the patience and instead drained off most of the liquid so it would thicken more quickly. When I told Gay about it, she said, "I told you to cook it till the cows come home." This time I am going to exert more patience, I think that must be another lesson to learn when dealing with cows and other things. . . . Here is Gay's salsa recipe:

GAY'S SALSA
8 quarts tomatoes, peeled and chopped (I like Roma the best)
8 cups onions chopped
4 cups green peppers chopped
2 1/2 cups white vinegar
1 cup fresh cilantro, chopped
1/2 cup salt
2 Tbsp garlic powder
2 tsp black pepper
Jalapeno peppers chopped (15-16 to taste)
Put all ingredients in a very large kettle and "cook it till the cows come home!"
Pour salsa into hot jars and process according to canning guidelines for your state.

Monday, September 15, 2008

THE PAINTER WITHIN. . . .

Our most recent goal has been to finish up the uncompleted projects before the winter rains and cold weather come. (Our winters here are generally pretty mild, but we are still limited on what can and should be done during that time.) Anyway, one of the projects has been to finish the siding on our house. We focused on that over Labor Day. We rented a roofing gun and special cutters for the siding only to find out later, that our neighbor had them and would have generously loaned them to us. Even though it was a relatively easy project, our stress levels were a little high. After we got the knack of it, Nathan, Mary, and I were good contributors to the project. We got to be pretty proficient at using the power tools and actually fitting and nailing the siding to the house. That allowed Jim to focus on the details such as fitting the siding around the gas meter, phone box, and placing the electrical boxes. We finished the South side of our house. I got it painted and now I'm moving on to some of our other unfinished projects.

Here I am with the measuring stick Jim made so we could get accurate placement of the siding.
Nathan, Jim, and Mary. Half of the south side is finished.


SLACKER!

I am leaving for Utah in nine days; I'm trying to get as much done as possible before I leave. I have been staining the doors that I never finished with our home addition, canning, and I even painted the chimney?!! The chimney? I have been accused of finding painting jobs if there are none available. I guess it is genetic. I remember my grandmother (who lived next door to us for much of my childhood) constantly having painting projects she was doing. I remember that she painted her sidewalks every spring. I haven't done that yet. (Jim won't let me!) I still have some other touch up painting to finish on the house trim and also the siding on the West side when we get that finished. That should satisfy the painter in me. Our shop will be needing paint in the Spring. . . .

More Zucchini Recipes

As Summer is starting to wane, the garden is producing at an all-time high. Those zucchini's keep on coming which leads me to yet another new zucchini recipe. I find it interesting to find another variation on the old favorite of zucchini bread. There is zucchini bread with nuts, without nuts, with pineapple, with chocolate, etc. . . . I found this one to be very exceptional. It calls for applesauce.

ZUCCHINI BREAD
3 eggs
2 cups sugar
2 cups peeled and grated zucchini
1/2 cup oil
3/4 cup applesauce
1 tsp vanilla
3 cups flour
1 tsp salt
1 tsp baking soda
1 tsp allspice
3/4 tsp. nutmeg
1/4 tsp baking powder
3 tsp cinnamon
1/2 cup chopped nuts
Preheat oven to 350. Beat the eggs until light and fluffy; add sugar, oil, vanilla and mix well. In a small bowl combine salt, soda, and spices and add to sugar mixture. Add flour. Stir in grated zucchini, making sure to mix it throughout the batter. (Be generous with the zucchini. I packed the zucchini into the measuring cup and threw in a little extra for good measure) Add chopped nuts. You can add more or less of the nuts. (In my opinion, more just makes it better!) Pour into two large greased loaf pans. Bake in oven at 350 for 1 hour and 15 min, until a toothpick inserted in the center comes out clean. (1 hour 15 min was exactly right for my oven.) Remove from oven; remove bread from pans and cool. Zucchini bread freezes very well.

Wednesday, September 10, 2008

ZUCCHINI QUESADILLAS

Here is a great new recipe:

Zucchini Quesadillas

2 Tbsp olive oil
1 onion chopped
1 tsp salt
4 garlic cloves, minced
2 medium zucchini, halved lengthwise and thinly sliced crosswise (8-9 inches long and approx 2 inches across! Small is better!)
1 cup frozen corn kernels
Taco seasoning or chili powder
Cooked chicken, pork, or shrimp (optional)
1/4 cup chopped fresh cilantro
flour tortillas
2 cups grated pepper jack cheese

1. Preheat oven to 400 degrees
2. In large skillet heat oil, add onion, salt and cook until onion is soft, then add garlic and cook 1 minute more.
3. Add zucchini and frozen corn kernels; cook, stirring occasionally, until zucchini is soft and corn is tender, about 6 minutes.
4. Heat tortilla in another pan. (We warmed ours in the microwave.)
5. Spread filling on 1/2 of tortilla, top with cheese and fold in half.
6. Repeat with the rest of filling and tortillas and place on a baking sheet.
7. Bake until cheese has melted and tortillas are golden brown, turning once
8. Remove from oven, slice into wedges.

We used the soft taco size tortillas. I would guess they are approximately 8 inches in diameter? This recipe made about 10 quesadillas. I used canned pork and it was very good. Chicken or shrimp would be good. Nathan thought that steak would be good. I'm sure it would! I served this with a little sour cream and fresh salsa since we have lots of tomatoes right now. We also have jalapeno peppers and fresh salsa is so delicious. Here is how I do it:

Fresh Salsa

Four or five Roma tomatoes (I like Roma because they are more meaty and less juice but other tomatoes work too just squeeze out some of the juice.)
1/2 med. onion
1/2 jalepeno pepper (with seeds)
Fresh cilantro
1 or 2 garlic cloves ( I have been using the bottled minced garlic and like it a lot. I just figure about 1 teaspoon per clove. That is probably generous, but I like garlic.)
Lemon or Lime juice
Salt to taste (probably at least 1 teaspoon)

Use a food processor or blender on pulse. Don't puree everything, you still want everything to be somewhat chunky. If it is too hot, add more tomatoes or less peppers and garlic. I have also made this using my Pampered Chef food chopper.


Tuesday, September 2, 2008

CORN-TOMATOES-GREEN BEANS-CABBAGE. . . .

Here is Grandma working in the garden! (Her passion!)

Yeah!! Finally our garden is in full production! We are eating wonderful tomatoes. I had one today that I'm sure weighed at least one pound. It was huge and delicious. I ate it for lunch along with corn on the cob! It was wonderful and I never tire of tomatoes and corn or most of the other of our home-grown goodies! I also picked a bucket of blackberries from our patch that grows wild. I never have to water or weed or fertilize. They just keep coming! From that bucket I froze two one-gallon bags of berries. We enjoy making blackberry cobblers especially for those who are visiting the Pacific Northwest. We also enjoy blackberry pie, smoothies, etc. Blackberries are wonderful fresh or frozen or in jams or desserts. Oregon is a wonderful place to live and grow a garden. We have a wonderful mild climate! (Most of the time we don't get snow, but we are close enough to snow if we want it. We are also close enough to the ocean for a visit there as well.) What I would like to know is if this is such a wonderful place why have all of our children migrated to the Wasatch Front in Utah? The only thing we are not close to is our family!! Yup, while we are growing this wonderful garden, our children and grandchildren are living 900 miles away! We wish they were here to enjoy it with us. So we hope for visits from them; and we keep the airlines and gas companies in business as we visit them.
Here is Mary with my one pound tomato.


Today's berry picking along with tomatoes and corn for lunch!


Here are the berries I picked today. I generally don't wash my berries before we eat or freeze them. They haven't been sprayed and they are away from the road where they might get lots of road dirt on them. They hold up better if you don't wash them. (What is a bug or two, right?) Then I spread them on cookie sheets and freeze them. After they are frozen I put them into gallon-size freezer bags to be used for delicious desserts or smoothies later on.

INVASION FROM SQUA-sh

NEWS FLASH--Reports of invaders are flooding the airways! The Zukes are taking control of even the most mild-mannered citizens, influencing them to make desperate choices and causing them to do unthinkable things even to unsuspecting family and neighbors. Take precautions now: Be extremely cautious when opening mailboxes. Make certain you keep your cars locked and windows rolled up. The notorious green aliens are known to be so bold as to come right to your doorstep. Make certain that if you do fall prey to the Zukes, you dispose of them properly so they don't return next year. Whatever you do, do not throw them into your back lot and hope you are rid of them. If you do, they will return with a vengeance next year! Some things you can do if all else fails: If you have a matched pair, you could hollow them out and make shoes out of them. You could hollow out one large one and make a canoe, or lash several together to build a raft. Children have been known to carve them into works of art and enter them in the county fair. You could use them as a baseball bat or another type of sporting equipment. Whatever you do, try to catch them before they explode into giants. If you can get them while they are less than one foot long and have a diameter of two inches or less, you can avoid becoming one of their latest victims!

Despite all precautions, the insidious invaders have struck again!

Tuesday, August 26, 2008

HAPPY 90TH BIRTHDAY, GARTH

My beautiful mother, Florence, & Garth on his 90th Birthday!

Garth recently celebrated his ninetieth birthday! WOW! As I have my mother and Garth living with us, and as Jim and I seem to have more and more aches and pains. . . .we can feel our bodies changing. Things aren't quite so easy as they used to be. . . . I often wonder at what point do we get old? We go day to day and don't seem to see much difference, but as we move from year to year or decade to decade, there are decided differences in our energy levels and ability to do things that used to come so easily to us. Our bodies are fascinating. How remarkable they are--with the ability to regenerate new cells, heal themselves, etc. I recently completed an Independent Study course through Brigham Young University: Essentials of Human Nutrition.

Here are some amazing facts about the human body:
  • If you live for 65 years or longer, you will have consumed more than 70,000 meals, and your remarkable body will have disposed of 50 tons of food.
  • Each of the body's cells is a self-contained, living entity, but at the same time it depends on the rest of the body's cells to supply its needs.
  • As living things, cells also die off, although at varying rates.
  • Some skin cells and red blood cell replenish themselves every 10-120 days
  • Cells lining the digestive tract replace themselves every three days.
  • Many muscle cells reproduce themselves only once every few years.
  • Liver cells have the ability to reproduce quickly and do so whenever repairs to the organ are needed.
  • Certain brain cells do not reproduce at all; if damaged by injury of disease, they are lost forever.

Monday, August 25, 2008

Catching UP

Our Family at Tammy & Jeff's wedding

This is why I don't keep a journal: I am forever "Catching up." The past eight months have been very full--starting with the biggest event of the year so far. Our son, Jeffrey Leo married Tamara Froisland on January 19, 2008. They were married at Wheeler Farm in Salt Lake City. Tammy is a wonderful young woman. Jim and I feel they are a perfect match! Jeff and Tammy honeymooned in Las Vegas. They are living in Sandy, Utah and house sitting for Tammy's parents while they are serving an LDS mission in Rochester, New York. Jeff works for University Hospital in the billing department. Tammy works doing medical coding in Sandy.

In February, I traveled back to Utah and spent some time with Jennifer's children while she and Paul went to New Orleans. I really enjoyed the time spent with the kids, getting them to school, dance, and basketball. I love it when I can spend some one-on-one time with the grandchildren. We are separated by such a distance that Jim and I miss out on some things. Of course we think our grandchildren are the best, cutest, and smartest. . . . And we aren't biased either!Alison (3), Porter (2), Jordan (6), & Taryn(3)

The day after returning home, Jim and I cashed in our Christmas gift from Matthew and Mary. They had given us tickets to see Bill Cosby at the Hult Center in Eugene. It was great fun! We felt like teenagers in comparison to the rest of the audience. Most people attending were baby boomers or older. Cosby was great! Matt and Mary told us they were giving us the "best Christmas present." It was pretty awesome.

Back to Utah again. . . .We borrowed a huge cargo trailer from our neighbor, packed our 1947 Plymouth and some miscellaneous furniture and other items that needed to get to either Salt Lake or St. George, loaded Jim, Nathan, Grandma, Grandpa, & I and took off. We dropped G & G at the airport where they flew to Salt Lake. On the other side, we picked up G & G in Salt Lake (after unloading the Plymouth and a few other things) and headed to St. George. Once in St. George, we loaded Grandma and Grandpa's possessions into the trailer. We left enough furniture, dishes, etc. to maintain housekeeping and living as Mom's condo is being set up as a rental for snowbirds. We headed back to Salt Lake, had a little time with our family, dropped Mom and Garth back at Uncle Lynn's house and headed back to Oregon! We picked up G & G a few days later at the Portland airport. It was a wild and crazy trip!

Matthew came home to visit after Winter Semester at BYU. We had a great time with him. We spent some time at the beach and also took a day trip to Silver Creek Falls. We spent a day at the Portland Temple as well. The Devil's Punchbowl located on the Oregon Coast.


Here we are at Nye Beach in Newport, Oregon.


This picture is from Silver Creek Falls.

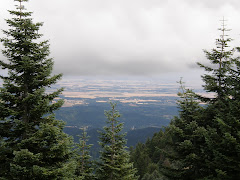
Jeff and Tammy came to visit in July. Jim, Mary, Jeff, Tammy, and I went on a fun trip to Crater Lake while they were here. (Nathan was at EFY.) First we stopped at the Lava Tubes and cinder cones near Bend, Oregon. That was amazing to see. We hiked through the lava tube which was over 1 mile long. . . .then on to Crater Lake National Park. We camped that night in the park. We got in late, so we were setting up camp in the dark. Jim got up early the next morning and got us tickets to go on the Crater Lake Boat Tour. I believe the hike to the lake was about 1 mile down. (Going down was the easy part!! Coming up was a lot harder especially after all our walking on the previous day.) The boat tour lasted 1 1/2 hours and it was awesome! We were so glad we put forth the effort to go on the tour. We have been to Crater Lake twice before, but the boat tour was a first. After getting home from the Cascades, we spent a day bowling; the final day with Jeff and Tammy we hiked to Mary's Peak--another short trip, maybe 30-40 miles from home and a short hike. (After all the hiking we did I think I lost 3-4 pounds!) It was a beautiful hike. On a clear day, you can see the Pacific Ocean on one side and look out to see the Three Sisters on the other. Unfortunately, we had some low clouds and fog, but it was still beautiful! Tammy & Jeff on the Crater Lake Boat Tour

We attended The Phantom of the Opera in Portland. This was Mary's birthday present and our Anniversary Present. I have seen it before and I could see it again. It was wonderful. We all loved it!

We had a fun visit with Jim's family: Kathy, Duane, Kimberly, & Keith from Santa Paula, CA, came to visit their daughter Katie and family (who live in Portland) to celebrate granddaughter, Elizabeth's first birthday. Diana and Douglas came down from Kennewick, WA. Katie, Edward, & Elizabeth joined everyone here on Saturday night for a cook-out, spent the night, and then we all went to church together. Doug, Diana, Jim, Alice, Kathy, Duane

Nathan has been going all summer and we all can hardly believe it, but school will be starting next week. Nathan spent a week on the Lebanon Stake Pioneer Trek. He spent a week at EFY in Forest Grove. . . .another five or so days on a Scouting Bike Trek on the Oregon Coast. . . .and last week he spent three days on a Ward Youth/Leadership Conference on the Northern Oregon/Washington Coast. He feels that he has been gone almost all summer but he has had a great summer. Today he got his Driver's License and got registered for his senior year at West Albany High School.

Mary started school today. She is doing the Pharmacy Tech program here at Linn Benton Community College. She has been working for Target for the past few weeks. They just hired her to work as the pharmacy tech in the Target store while she is doing the program at the college. Things seem to be coming together for her! She was also just called to be the Education Counselor in the Singles Ward Relief Society Presidency.

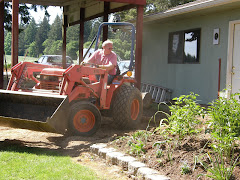
Amid all the busyness and coming and going, Jim and I have been working on a big project to convert our barn into a shop. This has involved digging out the dirt floor, leveling it, spreading gravel and setting some forms. (We also tore out a wall and shuffled everything out so we could have access to do the work. We did hire a concrete man to do the actual pouring and concrete work.) As if that was not enough, we decided that while we were doing it, we should a dig out a sidewalk and patio area along the south side of our house. It was a huge job which we started about mid-April and finished about early July. We thought it was never going to get finished! Fortunately, our neighbor generously loaned us his small tractor. Unfortunately, the tractor wasn't small enough to get into the barn and scoop everything up. We ended up shoveling most of the dirt into the tractor shovel first. It still made a huge difference. All in all, I have no idea how much dirt we moved, but it was a lot! I had also ordered about ten yards of bark mulch and planting mix which I moved almost by myself. We probably unloaded another ten yards of gravel. It is now done and it is really nice! We still need to put in electricity, a door, and replace some of the siding on the new shop! Jim also needs to finish organizing his tools! Now we have a shop; the garage is our new game room/food storage area since we brought Garth's pool table home from St. George. But we have no garage. . . .another time.
I think the only reason Jim wanted to do this project is
so he could drive a tractor. . . .He enjoyed it way too much!!

Oh, almost forgot. . . . we have another huge garden and we hope to get a good crop of tomatoes.

COMING UP. . . .

Nathan is going to continue on the WAHS Swim Team. This is his third year!

Alice & Florence will continue to harvest the garden--canning, freezing, etc.

James & Amber are expecting their third child--a boy around Christmastime!

Matthew continues to study at BYU. His major is Bio-informatics!

Paul is continuing work on his P.H. D.

Sunday, August 24, 2008

Staying Christ Centered

I recently read the book, At Home in Mitford, by Jan Karon. It is about a quaint southern town and its Episcopalian rector, Father Tim. Father Tim follows up on one of his new parishioners to find that he is having some struggles because other members are "hypocritical" in their lives. They aren't "living their religion." This really struck a chord with me as it is so easy to look at the lives that others live and try to reconcile their behavior with the teachings they profess. In other words, do they walk the talk? (A good question to ask ourselves.) We see this in our own lives and in the lives of members of our church. (My great-grandfather allowed the "hypocritical Mormons" to come between him and the Gospel he loved so much, even after he gave two years of his life in serving a mission to his homeland of Switzerland. His life was sadly empty of the blessings he, at one time, treasured so greatly; he died a bitter man. His children and grandchildren were also recipients of some of his attitudes; some are still suffering because of the choices he made. He allowed the choices of others to determine the choices he made.) I have heard it said, "If I were on trial for being a Christian, would there be enough evidence to convict me?" I loved Father Tim's response.

'"Well, Father, you probably won't like hearing this. You know the four things you told me to do when I left that day?"

"Pray. Read your Bible. Be baptized. Go to church."

"Well, I'm going to church. but I've got to tell you that it's full of hypocrites."

Father Tim laughed. If there was ever a popular refrain in modern Christendom, that might be it.

"My friend, if you keep your eyes on Christians, you will be disappointed every day of your life. Your hope is to keep your eyes on Christ."

"Yes, well..."

"I will disappoint you, Pete, they will disappoint you, but He will never disappoint you."

"I was about to say to heck with it."

"Don't quit! Are you reading your Bible?"

"Ah, well...I was."

"And then you quit?"

"You got it."

"Then you can expect to be weak on one of your flanks, and that's precisely where the Enemy will come after you with a vengeance." (1994, Karon, Jan, At Home in Mitford, pg. 327)


HERE IS A NEW RECIPE I CONCOCTED: I made some adjustments to a recipe I found and I believe it is better.

CHICKEN CACCIATORE (HUNTER CHICKEN)
6 Chicken Thighs with skin removed
1 Chopped onion
1 or more Green Peppers (seeded and cut into 1-inch pieces)
1 or more Red or yellow Peppers (seeded and cut into 1-inch pieces)
1 can sliced mushrooms (or fresh sliced mushrooms)
2 or 3 Garlic cloves, minced
1-15 oz can tomato sauce
1 jar or can of whole or diced tomatoes (drain off most of the juice; I use a quart of my bottled tomatoes.)
Other vegetables such as celery, carrots: optional
1 tsp basil
1 tsp oregano (opt)
Salt, pepper, garlic salt to taste
In a large pan (chicken fryer) spray with Pam. Brown chicken. (I used chicken thighs, but cut up whole chicken or breasts will work too. I prefer bone-in chicken as it is more economical and I believe that it is also more flavorful, but it is up to you.) When chicken is cooked thoroughly and tender, add cut up vegetables, saute until tender but not soft. Add tomato sauce, drained and cut up tomatoes, garlic, and seasonings. Continue to cook until mixture is heated throughout. I served Chicken Cacciatore with a rice mixture I found at Winco. (Wildrice mix) Enjoy!
"Hunter-style" refers to a dish cooked with peppers, onions, tomatoes, and mushrooms. It's more familiar name is its Italian name: Cacciatore (kah-chuh-TOR-ee) This is a very low fat recipe and very delicious! (The recipe I found contains a low 203 calories per serving; I eliminated the oil so it is less than 200 calories per serving.)


Thursday, January 31, 2008

Cashew Chicken

Here is a great new recipe which we had for dinner tonight. It was very good!

2 tablespoons cornstarch
1 tablespoon brown sugar
1-1/4 cups chicken broth
2 tablespoons soy sauce
1-1/2 pounds boneless skinless chicken breasts, cubed
3 tablespoons vegetable oil, divided
1/2 pound sliced fresh mushrooms
1 large green pepper, julienned
4 green onions (I cut them with my kitchen shears about 1/2-1 inch long)
1/12 teaspoons grated fresh gingerroot
1 or 2 cloves minced garlic
1 can (8 ounces)sliced water chestnuts, drained
3/4 cup salted cashews
Hot cooked rice

in a small bowl, combine the cornstarch, brown sugar, broth and soy sauce until smooth; set aside. In a large skillet or wok, stir-fry chicken in 2 tablespoons oil until no longer pink. Remove chicken and keep warm. (For a lower fat version, instead of using oil, I sprayed my pan with Pam. Then when the chicken was done, I removed it and used the remainder of the chicken broth to stir-fry my vegetables.)

In the same skillet, stir-fry the mushrooms, green pepper, onions and ginger in remaining oil until green pepper is crisp-tender, about 5 minutes. Stir in the chicken, water chestnuts, garlic and cashews; heat through.

Stir broth mixture and add to the pan. Bring to a boil; cook and stir for 1-2 minutes or until thickened. Serve with rice. Yield 4-6 servings.

Here is Mother with her beautiful quilt, "My Grandmother's Dream" made for Jeff and Tammy Johnson. Each complete block is made with eight different fabrics going from light to dark or dark to light so there is a positive and a negative block in each color.


Here I am with my quilt. Mine is a stack n whack. I think it is awesome! It is made by stacking four pieces of fabric so that pattern in each piece in the stack is cut identical, then the parts of each block are turned one-quarter so there is a twist in it. Each block is completely unique!

Clean Cup, Move Down!

Also the address for this blog, "Clean cup, Move Down!" seems to fit my life right now. If you recall in "Alice in Wonderland" during the Mad Hatter's tea party, Alice barely gets started on her tea, when the Mad Hatter or the March Hare exclaim, "Clean cup, move down!" Alice gets more and more frustrated. I can kind of relate. I do manage to get things finished, but unfortunately, lots of pressure gets put on my family in the process!

Quilts have been a tradition in my family. I have several quilts that my mother and grandmothers have made for me. I've tried my hand at quilting and have learned things along the way. (Mostly through trial and error and reading books. I have learned a lot.) A few months ago my Aunt Betty phoned my mother and challenged her to make a quilt. Aunt Betty was working on one called "My Grandmother's Dream." She was very excited about it. She sent Mom the instructions, and she began with the intent of making quilts for Jeff and Matt because they "are of marriageable age. " Shortly after, Jeff announced his engagement. Mother was well on her way to getting Jeff's quilt made, but I needed to make one too.

We only have one sewing machine here, which is actually my Mother's machine. My machine was in St. George, Utah at her home there. We obviously needed two machines if we were both going to be making quilts (and other sewing projects). My cousin, Lynette, who lives in Moapa, Nevada goes to St. George regularly and she was willing to get my machine, take it to UPS, have them package it and sent here to Oregon. She insured it for $1,000. We were excited to have two machines working on these big projects! A few days later the machine arrived, I unpacked it, and after close examination, it was obvious that the machine hadn't been packed carefully enough and it had been thrashed in shipping. The local Viking dealer informed me that it would be impossible to fix. One thing led to another and I ended up with a brand new Bernina! It is great! I haven't had a chance to take the classes to learn how to use the machine yet. I have figured out how to use what I needed on my own. It does some AWESOME things, including automatic needle-threading, which I haven't figured out yet?! CLEAN CUP, MOVE DOWN! The classes are coming up in February! The quilts got finished and they turned out great!